|
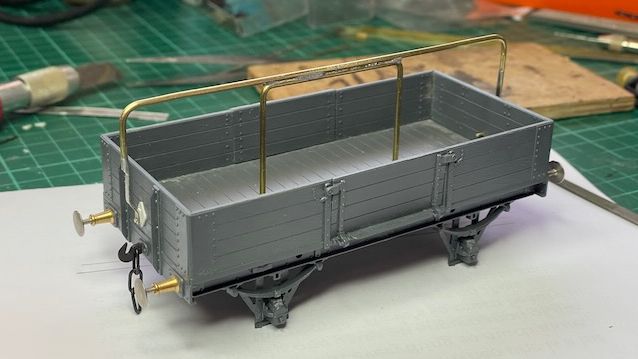
Sheet supporter
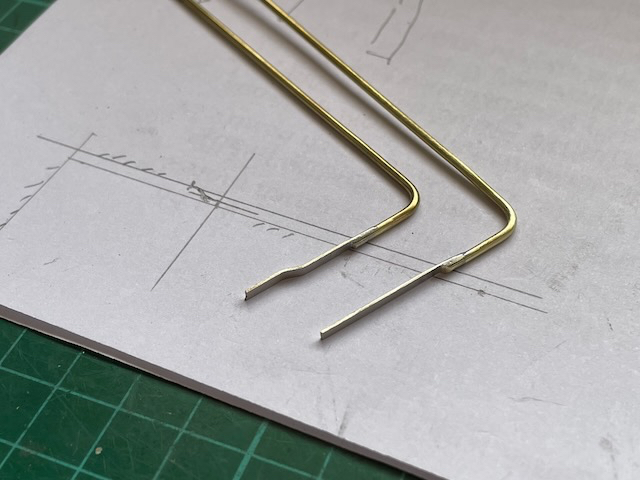
The semicircular guide is formed from T-section brass. It bends easily around a suitable former. One side is filed flat to make the L-section of the finished thing. Don't try to bend L-section, it will twist all over the place. |
|
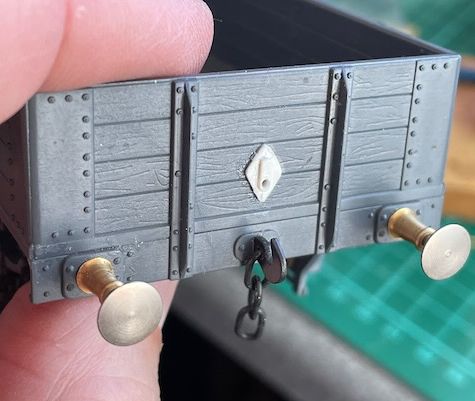
| Pivot plate made of plasticard and glued to the end of the wagon |
|
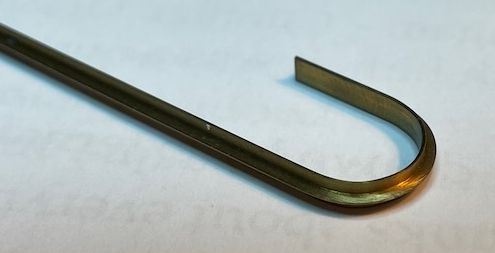
Sheet rail formed from brass rod (1.6mm diameter was used, although ideally 1.4mm would be more correct for 7mm scale), filed to half thickness at the end and a flat section piece solder on, then the joggle formed.
One curious detail is that on some of the 4-plank wagons the blocks that hold the semicircular guide are on the bottom plank, and on others they are on the second plank up. The thing is to make sure the sheet rail is sized so it lies exactly on the top of the wagon side when tilted over. That will give the correct height to the rail when upright. |
|
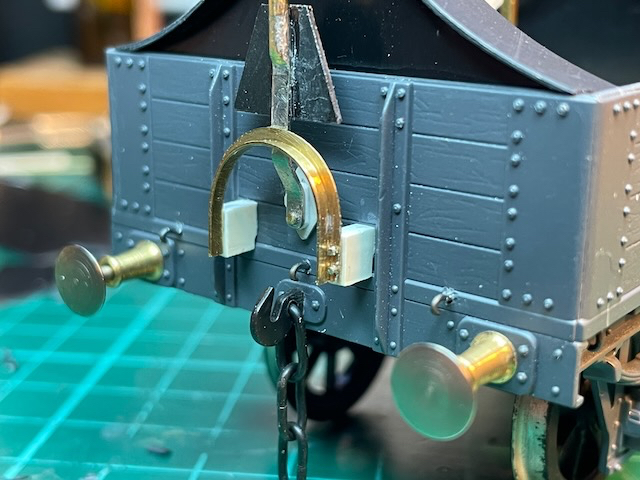
For a wagon that will have a sheet, it is easier to make the rail in two halves, and solder together, rather than trying to get both the bends in just the right place for the length needed.
An inverted U-shaped prop helps to keep the rail straight when its two halves are soldered together. |
|
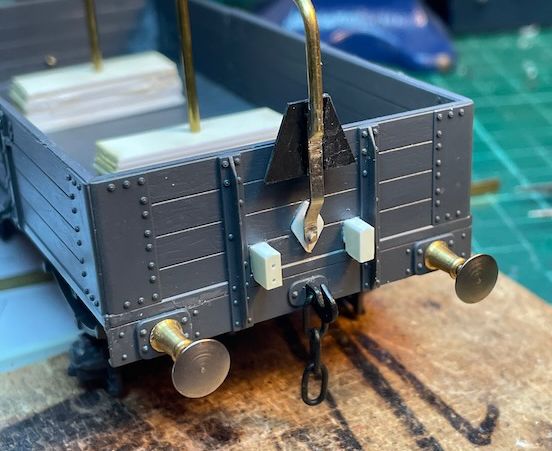
| The trapezoid-shape plate to the rail is added – as this will mostly be covered by the sheet, I didn't add the detail of the strips that held the real thing in place |
|
Some curved plasticard shapes were added, to support the tarpaulin either side of the supporter bar.
The semicircular guide is added to the blocks (cut from strip). I drilled and pinned these for strength, but this is probably too fiddly and not needed in 4mm |
|
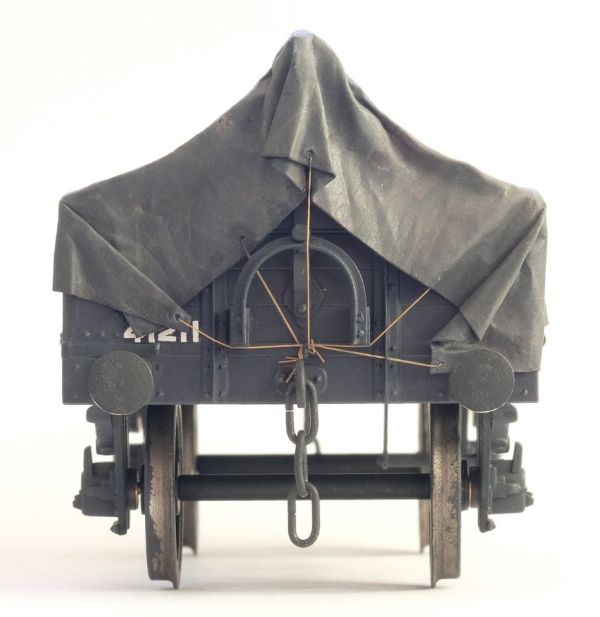
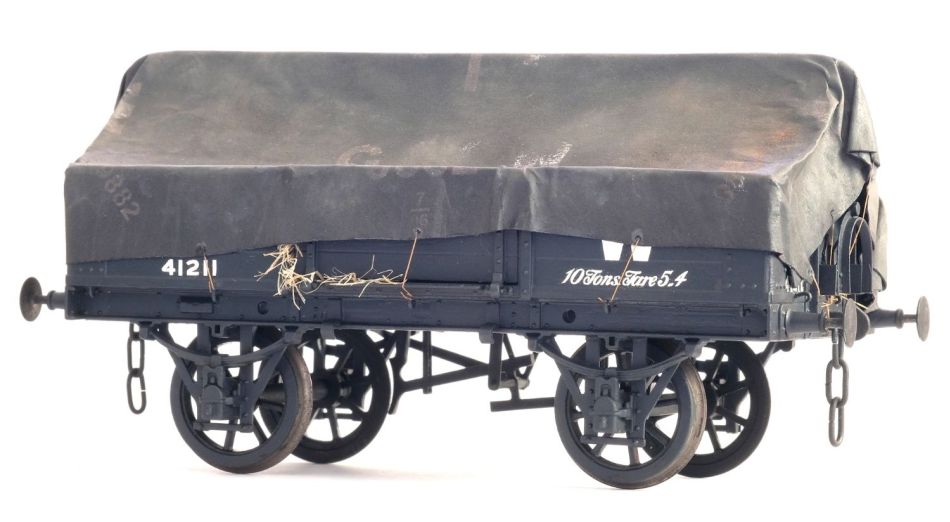
Tarpaulin
The tarpaulin is based on a technique by Mikkel Kjartan, with elements of other people's methods and some tweaks of my own.
The starting point is the Ian Smith's GWR sheet artwork.
After editing this to get the required sheet number, it is printed with a laser printer on the thinnest printer paper I could find (60gsm rather than the usual 80). The paper then has self-adhesive aluminium tape stuck on the back – the stuff used to seal the joints of sheets of insulation used for roofs, etc. It's this tape that helps the paper hold its shape. The sheet can then be cut to size.
The cords that hold the sheet in place are EZ-line – very fine elastic – so they stay taut. The line is glued to the back of the sheet before it is fitted to the wagon, and run through small holes made in the edge of the sheet. Of course, it means you have to model the cleats where the cords are tied off – little hooks of fine wire in holes drilled in the body.
There are a few tricks to getting the sheet to form the right shape. As you see in the last construction picture, there is a plasticard former at the ends, and half way along the wagon, that the sheet is glued to to get the right, curved shape. The sheet is stuck on in stages, first the ridge, then to the formers, then the top of the wagon sides. I preform the sheet before gluing, to establish the main fold lines and creases, looking at prototype photos to see how the sheet should hang. The final stage is gluing the folds at the ends, poking a bit of Rocket Hot CA glue under the folds with a cocktail stick.
The aim is to get a sense the sheet is pliable, and hangs under its own weight, and tensioned by the cords. Getting the main creases as sharp as possible is key. Another trick is that the edges of the sheet are cut with a very slight curve between each tie point, so it looks like it is under tension. I made a template from scrap brass sheet to cut these curves.
Weathering is with powders. For this very dirty example, I edited the image file on the computer before printing, so it was brown-grey, and a dirty white, rather than a pure black and white, to give the weathering a head start. Of course, if you want a relatively clean sheet, don't do that.
One final tip: I find the print from the laser printer can flake off slightly. You just need to touch it in with a suitable mix of paint. Although it is a chore, it can help add a slight colour variation to the sheet, creating the sense of dirt and wear.
(Webmaster's note: Further detail about the construction of the tarpaulin can be found on Nick's blog.)
Further reference: Drawing of RCH sheet rail (which is extremely similar to the GWR design)
|