| Section Page | Previous Page | Next Page |
Detailing the N gauge Dapol B-set coachesby Maurice PearceFirst published in "Model Rail", April 2004
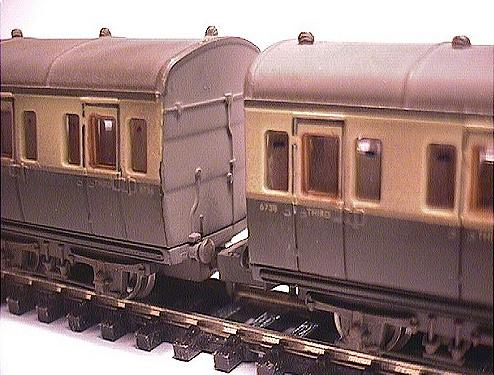
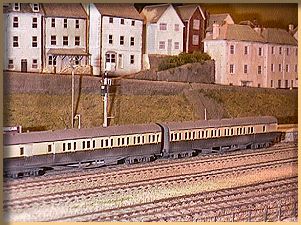
Much to the delight of thousands of British N-gauge modelers Dapol entered the RTR market at the December '03 Warley show with a range of GWR and ex GWR coaching stock. In the first batch of releases were a delightful pair of chocolate and cream GWR 'B' set coaches (also released in lined BR maroon). To the best of my knowledge these are the first British, pre-nationalisation, RTR coaches, that have been produced since the now much sought after Minitrix Gresley 'teaks'. The prototype What then were GWR 'B' sets? These were pairs of brake composites, running with the brake compartments placed outermost, and often were semi-permanently coupled.
They were coaches built essentially for branch traffic and lightly loaded secondary services but were often to be seen running to and from Swindon on running in turns with Castles and even Kings! Many sets were branded on their outer ends for specific 'turns'. Some sets had no buffers between coaches but the type modeled by Dapol had short stocky ones and these have been well represented on the model but normal buffers on the outer ends would be better. From their running numbers (both different and a nice touch) I presume them to be modeled on ones built to GWR diag. E.147. These coaches were built in 1936. However they were 57-foot versions and the model is clearly a wide-bodied 61' 2" type such as diag. E140 of an earlier 1931 build. This may be a bit nit-picking for most and they will be more than happy with the model straight out of the box. They appear to be 50% reductions of the original Airfix 'B' set coaches and I look forward to the GWR 'Centenary' stock and the LMS ones being hopefully released in the future. Detailing If like me you like fiddling about with your models to add more detail here are a few of the things that can be done easily to improve the appearance.
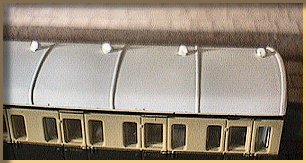
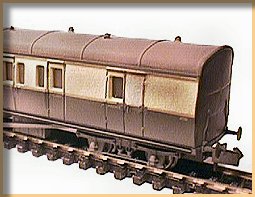
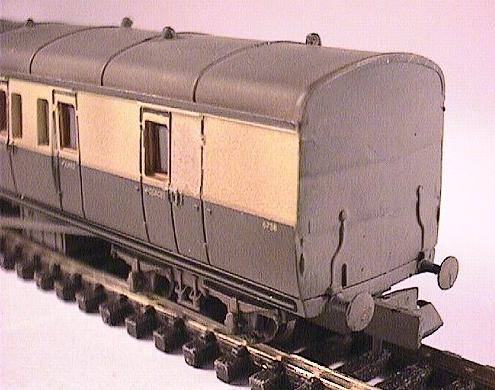
Roof A quick solution is to apply the tip of a soldering iron to both sides of the vent to reshape them. Avoid breathing in any resulting fumes. A quick rounding off and a touch up with paint and they don't look too bad (see picture). However as we are usually looking down on our rolling stock roofs it might pay to make the vents as accurate as possible. This involves paring off the original vents and replacing them with plastic 'shell' vents from B&H Enterprises or with Ultima Models ones, or from the N Gauge Society (members only). Body sides
If that is correct the outer window on one and the inner one on the other needs filling in with Miliput or body putty and then repainting (see drawing below). Also on one side only there is no window next to the guard's door. The same Milliput treatment is the solution. Incidentally, if you want to paint the interior of the coach or put passengers in it then disassembly is simplicity itself. Pull off the bogie (click fit) from the luggage end and underneath you will see a single screw which when removed will allow the chassis and seating to come away from the body. Unfortunately for re-spraying the glazing has been stuck in. Putting no smoking signs etc. on the windows might be going a bit over the top but they do enhance the new Bachmann Mk. 1 coaches.
There is no dynamo fitted and an Ultima one will improve the appearance greatly. Next job is the battery boxes. Some illustrations show two on one side and one on the other (see drawing). If you want to replicate that feature, make a further one from 80 thou. plasticard, scribed to suit and glued in place. You could replace the buffers on the outer ends with turned brass ones again from B&H or the N Gauge Society (£3.50 for 20). On all the photos I have looked at the emergency vacuum brake piping is on the inner ends only so I removed those on the outer ends of the models by paring them off with a scalpel then repainting. Tip – mix a little brown into the matt black to take the 'starkness' out of the black. Painting and weathering That's it, nothing else I can think of. Is any of it necessary? Well not at all really. If you are happy with these coaches, straight out of the box, all well and good. I personally just like fiddling about for the hell of it. Well done Dapol for another sure-fire winner. The future's bright, the future's 'N'. Maurice Pearce |
| Section Page | Previous Page | Next Page |